Install
Norwegian Flagstone is delivered as a complete, numbered surface, ready to be reconstructed at the project site. The installation method depends on the intended use and the construction beneath the stone. For pedestrian outdoor areas, the flagstones can be installed on a stable, free-draining aggregate base. Indoor areas and many outdoor constructions use a solid concrete base, with the flagstones bonded using a suitable high-quality adhesive. In both cases, the project drawing, stone numbers, arrows and alignment marks guide the installation from the first stone to the completed surface.
The picture on the right shows Norwegian Flagstone installed on both unbound and solid bases.

The numbered stones are rebuilt on site using the project drawing and the markings established during production.
Two different choices
01 · Unbound base — For paths, patios and other pedestrian outdoor areas.
02 · Solid base — For concrete slabs and other stable, bonded constructions.
01 · Installation on an unbound base
-
A natural and free-draining construction
Norwegian Flagstone is well suited for installation on an unbound base in pedestrian areas. The open construction allows water to drain through the joints and into the ground. A fall is therefore not normally required solely for surface drainage, provided the complete construction is permeable and the ground conditions allow the water to drain away. The supporting base must be stable, properly compacted and suitable for the local ground and climate conditions. This is part of the preparatory groundwork and must be completed before installation begins. Areas exposed to vehicles require a separately engineered construction and are not covered by this installation method.
Suitable for pedestrian areas on a stable, free-draining base

-
A stable foundation
Before installation begins, the underlying construction must be checked. The sub-base must be stable, properly compacted and capable of carrying the intended loads without settlement or movement. The required depth and construction will depend on the existing ground, local climate, drainage conditions and intended use of the area. The surface should be even and prepared to receive the final bedding layer.
- Stability and compaction
- Drainage conditions
- Correct construction depth
- Frost protection where required
- Load-bearing capacity
- Levels and connections to adjoining surfaces
- Edges and restraints
- Suitability for pedestrian use
Preparatory groundwork — The supporting construction must be completed and properly compacted before installation begins.

-
A firm bed for the complete stone
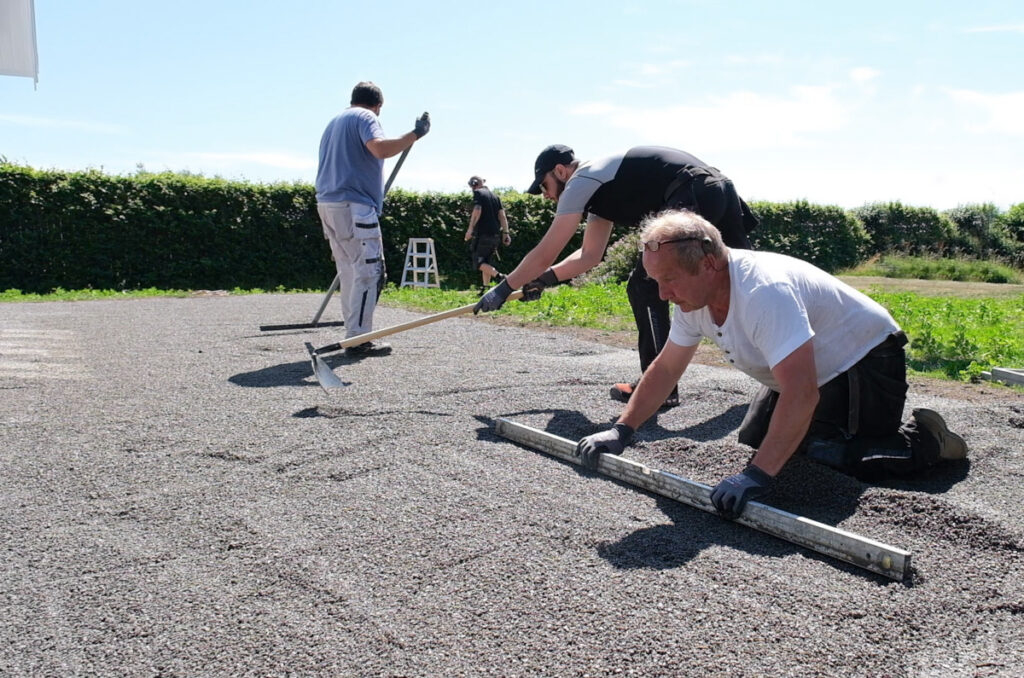
Apply a bedding layer of clean crushed aggregate, typically 2–5 mm, or a comparable material without fines or stone dust. A layer of approximately one inch, around 25 mm, is normally sufficient when placed on a correctly prepared and compacted sub-base. The bedding material makes it possible to adjust each flagstone and create stable, continuous support beneath the complete stone. Use a straightedge and spirit level to level the bedding layer before and during installation.
- Consist of clean, crushed aggregate
- Have a suitable grading, typically 2–5 mm
- Contain no fines or stone dust
- Be approximately 25 mm thick
- Provide support beneath the entire stone
- Allow accurate height adjustment
- Remain free-draining
Bedding layer — A thin layer of clean crushed aggregate makes accurate levelling and full support possible.
-
Begin with the drawing
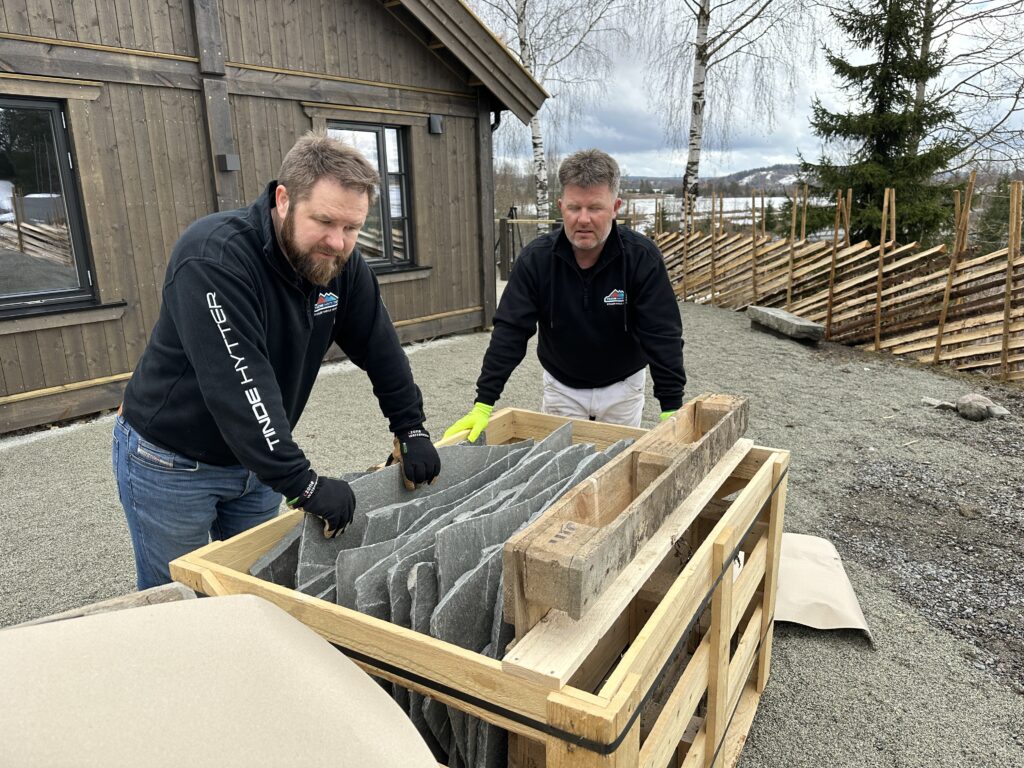
Use the project drawing to identify the correct starting point, installation direction and section references. Installation normally begins in a corner. From this point, it can be useful to work in more than one direction. This makes it easier to maintain an even joint width and avoid accumulating deviations across the surface. Check the stone number, arrows and alignment marks before positioning the first flagstone.
- Identify the correct starting corner
- Check the project drawing
- Confirm the first stone number
- Check arrows and orientation
- Identify reference and alignment marks
- Establish the required finished height
- Plan the direction of installation
Start in the right place and follow the markings
-
Stable before moving on
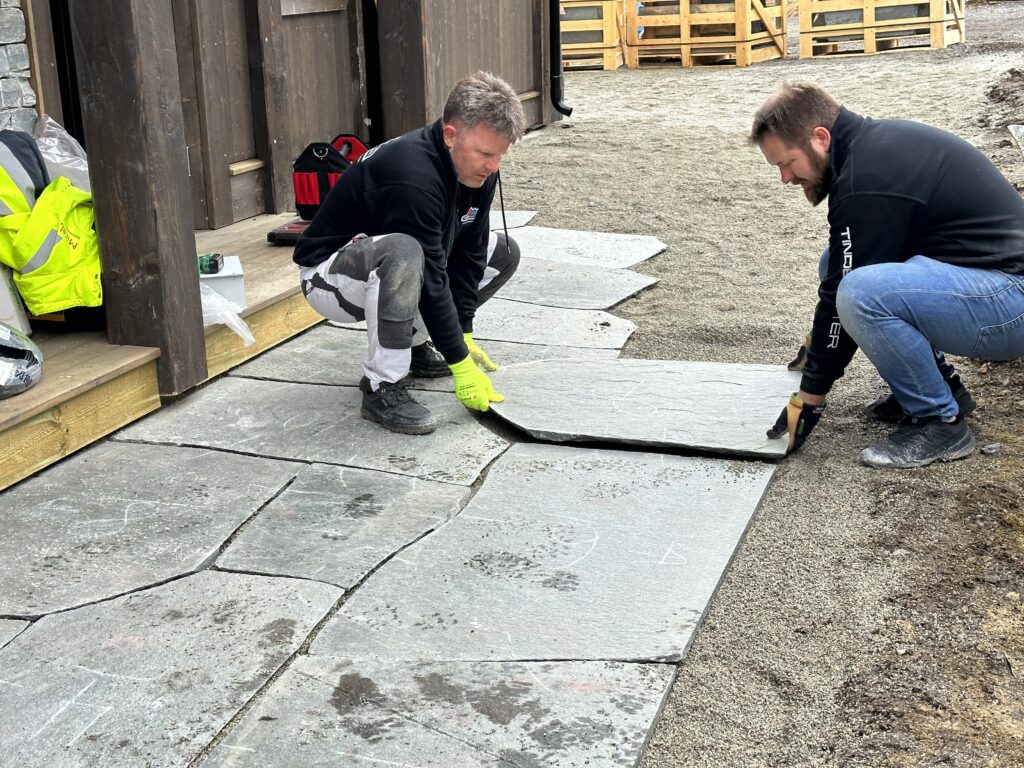
Place the first flagstone in the prepared bedding layer and adjust it to the correct height. The stone must have stable support across its entire underside. Adjust the bedding material as required until the flagstone remains firm and does not rock. Complete and stabilise one stone before positioning the next. Follow the numbering, arrows and alignment marks established during production. Check joint widths, levels and the relationship between neighbouring stones continuously.
- Correct stone number
- Correct orientation
- Alignment marks
- Even joint widths
- Stable support
- Finished height
- Level between adjoining stones
- Connections to edges and fixed elements
Full support — Each flagstone is individually adjusted until it is stable and supported across its complete underside.
-
Check the joints as a whole
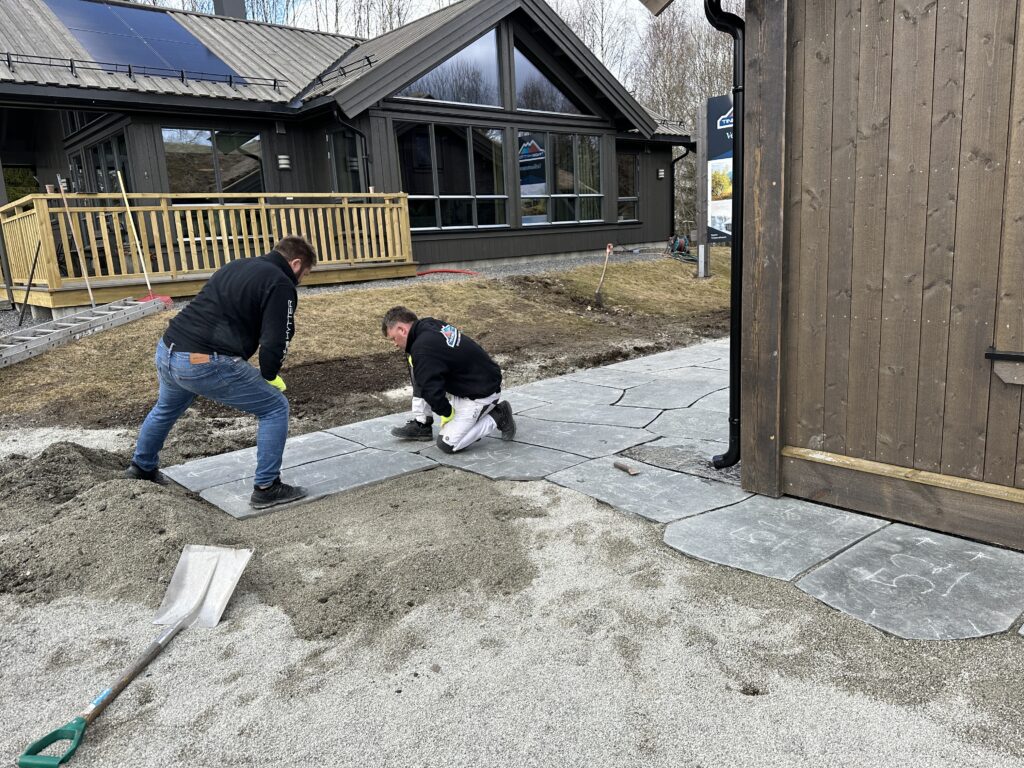
When all stones have been positioned, inspect the complete surface. Minor joint adjustments can be made carefully using a pry bar. Work gradually and distribute the adjustment across several joints rather than forcing a single stone. Protect the slate edges and avoid direct pressure that could chip or damage them. After adjustment, check that every stone remains stable and correctly supported.
- Joint widths
- Joint directions
- Alignment marks
- Outer boundaries
- Connections to adjoining surfaces
- Levels between stones
- Stability of every stone
- Overall visual expression
Joints adjusted without damaging the edges
-
Remove all production marks
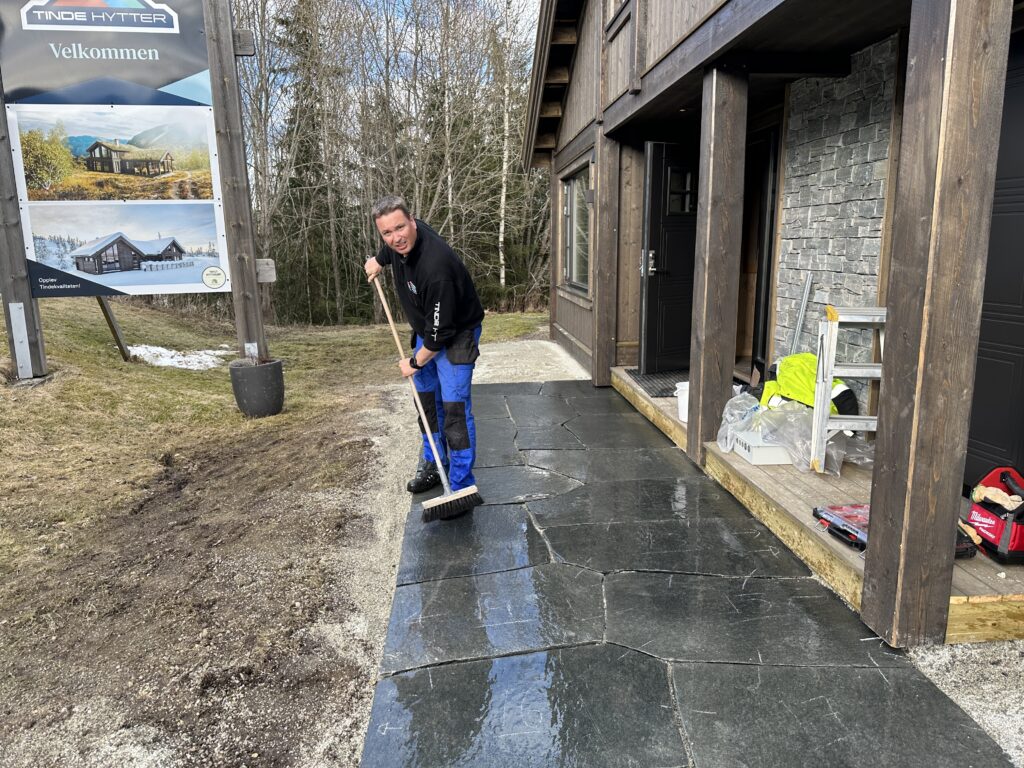
Wash the completed surface using clean water from a hose and a suitable brush. Chalk numbers, arrows and alignment marks are removed by gently scrubbing the surface. Clean the stone thoroughly before the jointing material is applied. Avoid aggressive cleaning methods or products that could damage or discolour the slate.
Numbers and markings removed with water and brush
-
Allow water to drain
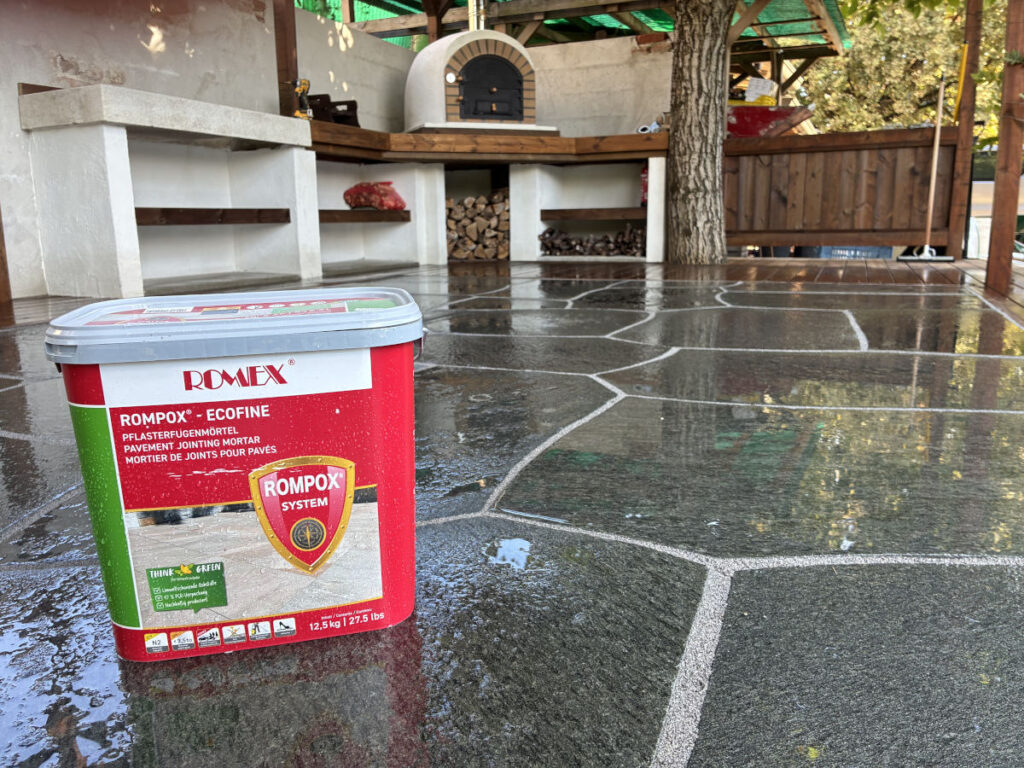
A surface installed on an unbound base must have permeable joints. A suitable permeable jointing compound, such as Rompox Ecofine or a comparable product, is recommended. Always follow the jointing-product manufacturer’s instructions regarding joint dimensions, preparation, application and curing. Fine decorative aggregate may also be used together with a suitable stabilising binder, such as Rompox Decofix or a comparable product. Loose 2–5 mm crushed aggregate is not suitable as a finished joint material on its own. It will remain loose and is likely to be carried onto the surface during use. Fine compactable aggregate may be an alternative in some constructions, but it will not provide the same stability or performance as a purpose-designed permeable jointing system.
- Permeable jointing compound
- Fine decorative aggregate with a suitable binder
- Another documented, permeable jointing system
- Fine compactable aggregate where appropriate
- Loose 2–5 mm crushed aggregate without a binder
Permeable joints for a free-draining surface. Draining joints — The jointing system must allow water to pass through the construction.
-
Only where it adds value
Impregnation is not normally necessary for outdoor areas. Outdoor exposure, sunlight and weather will gradually reduce the effect of many impregnating products. For most paths and patios, regular cleaning is normally sufficient. Impregnation may be useful in areas exposed to oil, grease or food stains, such as around grills, outdoor kitchens and dining areas. Always test the product on a small, inconspicuous piece of slate before treating the complete surface. Use a breathable product suitable for natural stone and outdoor use.
- Grills
- Outdoor kitchens
- Dining areas
- Areas exposed to oil or grease
- Surfaces that are difficult to clean
Test first, treat only where needed

-
Ready for use
The numbered surface has been reconstructed. Every stone is stable and fully supported. Joint widths and levels have been checked. Production markings have been removed. The joints remain permeable and allow water to drain through the construction. The Norwegian Flagstone surface is ready for use.


02 · Installation on a solid base
-
A bonded construction
On a solid base, the flagstones are bonded to the supporting surface using a suitable natural-stone adhesive. The numbered surface is first laid out without adhesive. This makes it possible to check the complete arrangement, adjust the joints and confirm the alignment marks before permanent installation begins. The stones are then lifted section by section and bonded from the defined starting point.
Lay out, check, lift, bond

-
Clean, stable and ready for bonding
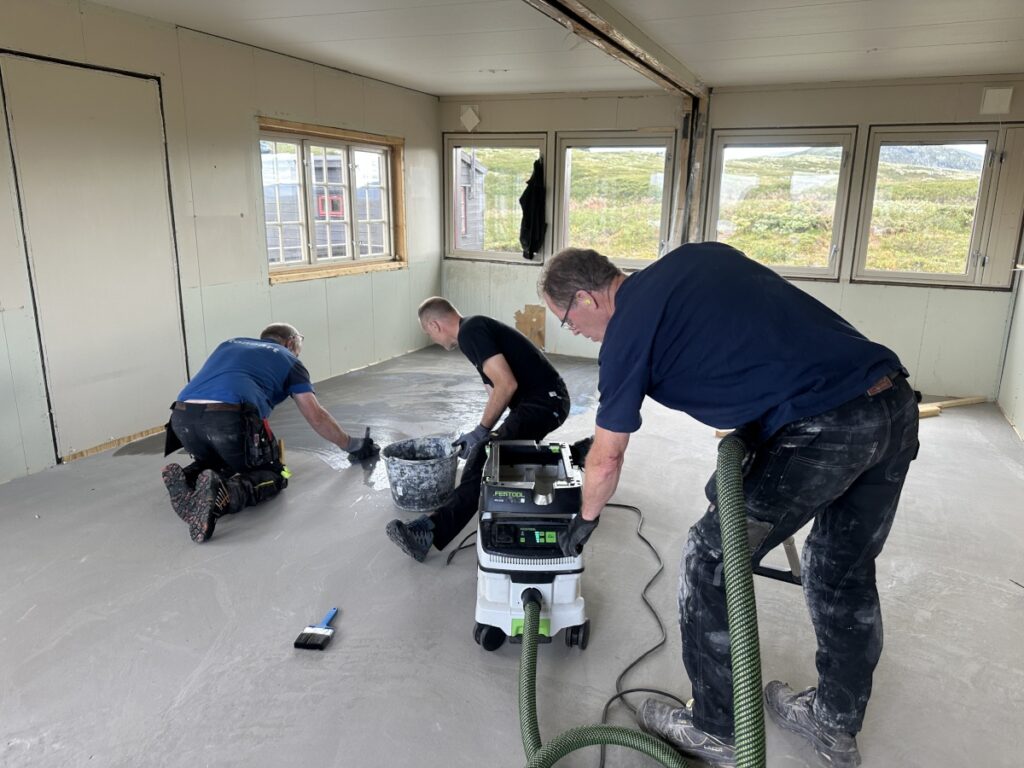
Clear and clean the entire installation area before laying out the stones. The supporting surface must be stable, sufficiently cured, clean and free from dust, oil, loose material and other contamination that could reduce adhesion. Concrete surfaces will normally require a suitable primer. The required preparation, moisture condition and primer must be determined according to the substrate, adhesive system and product manufacturer’s instructions.
- Stability
- Curing and moisture condition
- Cleanliness
- Dust and loose material
- Cracks and movement
- Flatness
- Required falls
- Levels at adjoining surfaces
- Need for primer
- Need for movement joints
Cleaned, checked and primed where required
-
Rebuild the surface before bonding
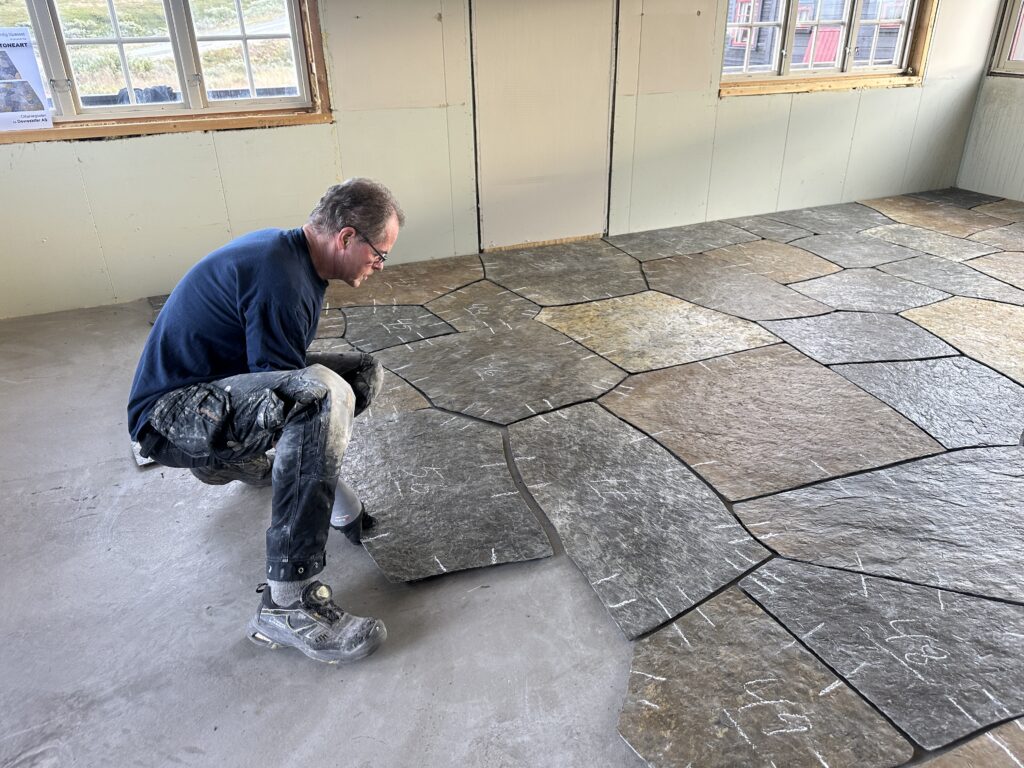
Lay out all the numbered flagstones on the solid base before applying adhesive. Follow the project drawing, numbering, arrows and alignment marks. Adjust the stones until the joint widths are even and the alignment marks connect correctly. The dry layout provides a final opportunity to confirm the complete composition and its position within the project area.
- Starting point
- Stone numbering
- Correct orientation
- Alignment marks
- Joint widths
- Outer boundaries
- Fixed elements and openings
- Levels and transitions
- Movement-joint positions
- Overall placement
The complete surface checked before bonding. Dry layout — All stones are positioned and checked before they are permanently bonded.
-
Work from the defined starting point
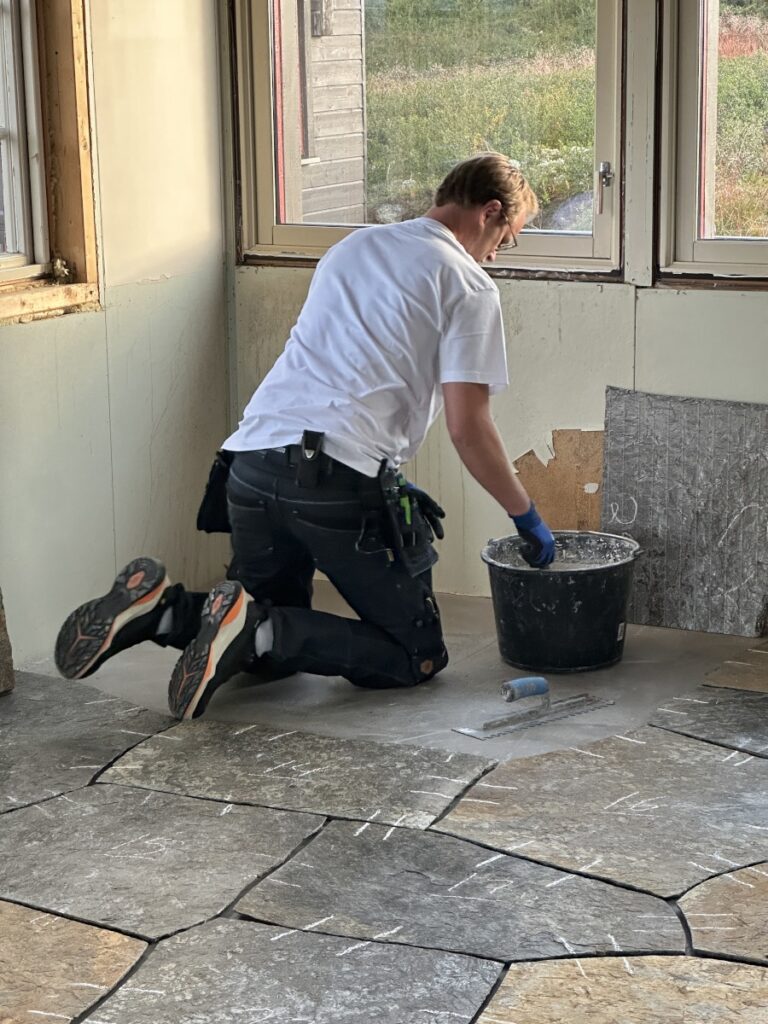
Divide the dry-laid surface into manageable working sections. Lift one section at a time, keeping the numbered stones in the correct order. Begin in the corner or at the starting point defined on the project drawing. Continue systematically from the starting point towards the opposite end of the area. Avoid creating isolated sections that are difficult to connect accurately later.
- Project drawing
- Starting point
- Stone numbering
- Section references
- Installation direction
- Alignment marks
- Access requirements
- Adhesive working time
One section at a time in the correct sequence
-
Adjust every stone to the correct height
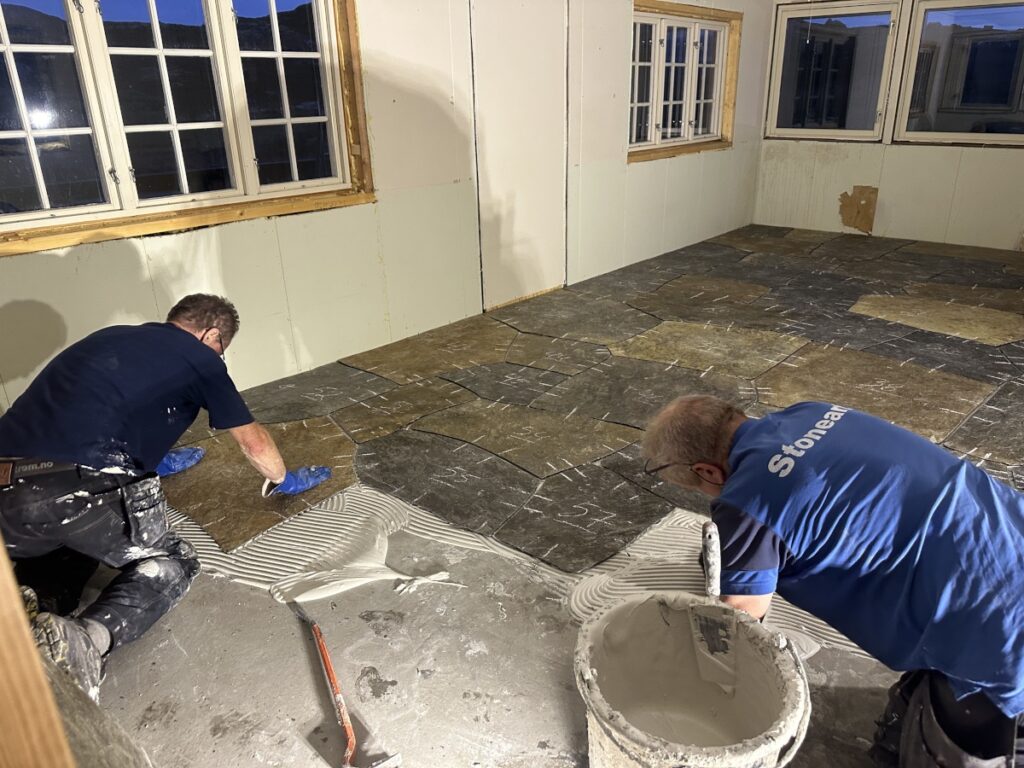
Use a high-quality adhesive suitable for natural stone, the supporting base and the intended environment. Although the flagstones are thickness-adjusted, the natural surface will still vary. Thickness adjustment establishes a maximum thickness, but some stones may require more adhesive beneath them to achieve the correct finished level. Apply sufficient adhesive to achieve the coverage required for the installation. Each stone must be properly supported without voids that could lead to movement, water accumulation or breakage. Check the finished height, stability and relationship to adjoining stones continuously.
- Correct adhesive for the construction
- Adhesive coverage
- Support beneath the complete stone
- Finished height
- Surface variation
- Joint width
- Alignment marks
- Level between adjoining stones
- Falls in wet or outdoor areas
- Clean stone edges and surfaces
Full support, correct height. Natural surface variation — Thickness adjustment reduces variation beneath the stone, while final height is controlled during installation.
-
Do not allow adhesive to dry on the slate
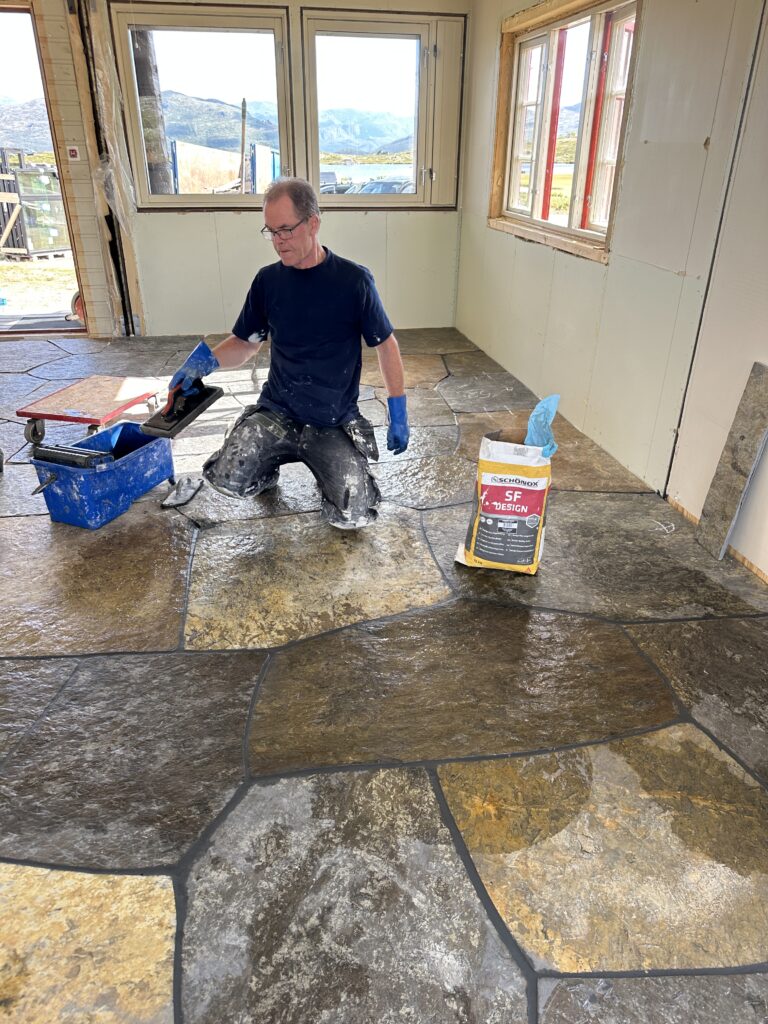
Remove adhesive from the slate surfaces and joints continuously during installation. Do not allow adhesive residue to harden on the natural stone. Keep the joint spaces sufficiently clean and open for the selected grout. Use clean water and suitable tools, following the adhesive manufacturer’s instructions.
Remove adhesive before it hardens. Flow-bed or fluid adhesive may be used by experienced installers where it is suitable for the construction. Product selection and application must follow the adhesive manufacturer's requirements.
-
Allow the installation to set
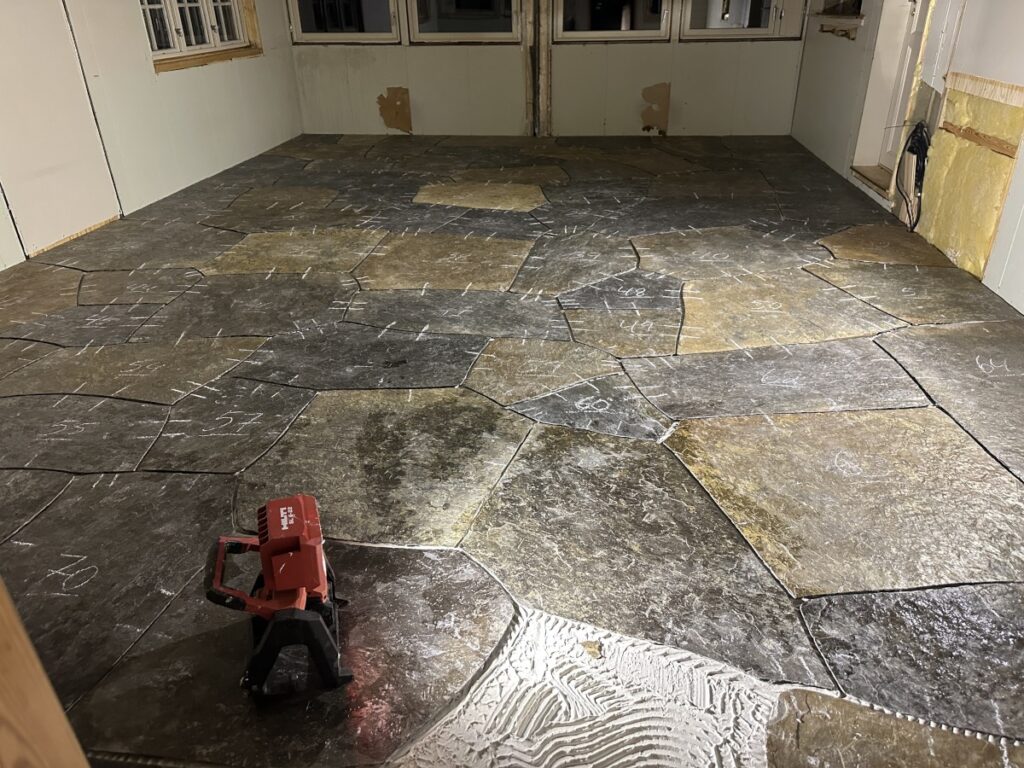
The adhesive must be allowed to cure before jointing begins. Protect the installed surface from traffic, movement, water, frost and other loads during the curing period. Required curing time will depend on the adhesive, temperature, humidity, substrate and installation conditions. Follow the product manufacturer’s instructions.
Protect the surface until the adhesive has cured
-
Fill the complete depth of the joint
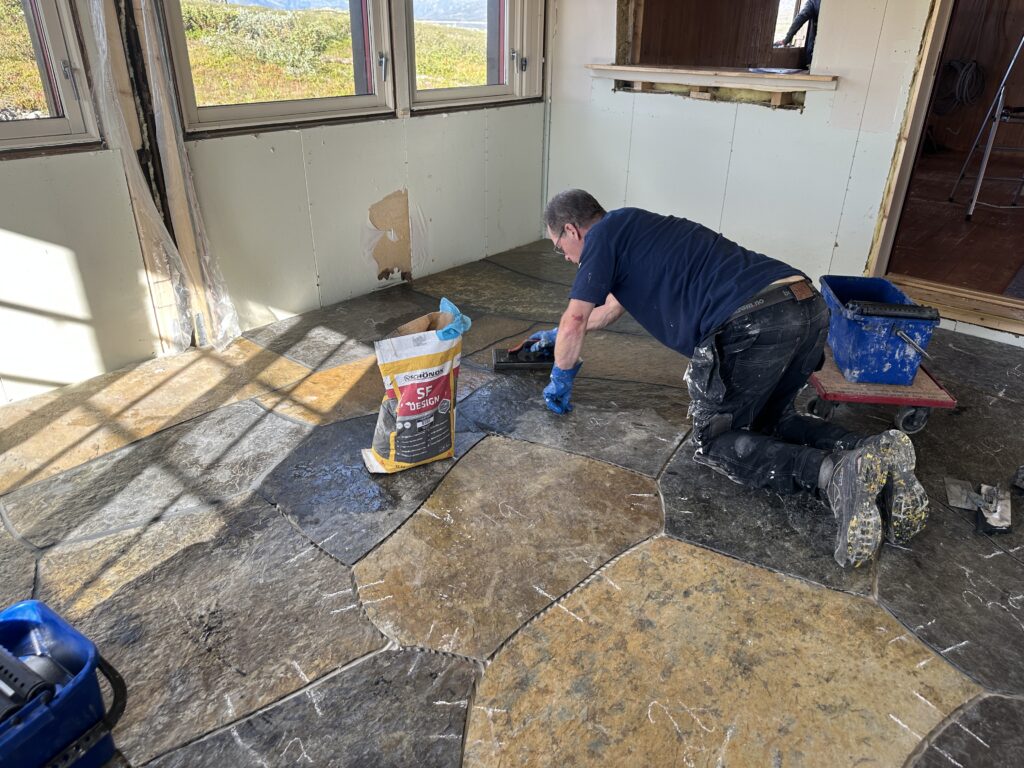
Use a jointing mortar with a texture and appearance suited to the natural character of the slate. The clipped edge slopes inward beneath the upper edge of the stone. The joint is therefore wider below the surface than it appears from above. It is important that the jointing mortar fills the complete joint without leaving voids. Work the mortar thoroughly into the joints using a rubber squeegee or another suitable jointing tool. Clean the slate continuously as the work progresses. Grout residue, chalk numbers and alignment marks can normally be removed during the same cleaning process.
- Complete filling of the joint
- No hidden voids
- Suitable joint width
- Suitable jointing depth
- Good connection to the slate edges
- A texture suited to the stone
- Clean slate surfaces
- Correct treatment of movement joints
The complete joint filled without voids. Clipped edges — The edge slopes inward, making it essential to fill the complete joint beneath the visible opening.
-
Protect the surface where required
Impregnation is recommended for indoor installations and may also be beneficial in shaded or stain-exposed outdoor areas. Always test the product on a small, inconspicuous piece of slate before treating the complete surface. Some impregnating products can deepen or alter the colour of the stone. Use a breathable impregnation suitable for natural stone and the intended environment. The slate and joints must be sufficiently clean, dry and cured before treatment.
Test the product before full application

-
Additional protection during construction
On request, the flagstones can be impregnated before delivery. Factory impregnation reduces the risk of staining during transport, handling and the construction period. It also makes the slate easier to clean during installation and jointing. The joints are not treated at the factory. After the adhesive and jointing mortar have fully cured, the joints must be impregnated separately where complete surface protection is required. Use a breathable product compatible with both the slate and the jointing material.
Stone protected before delivery, joints treated after curing
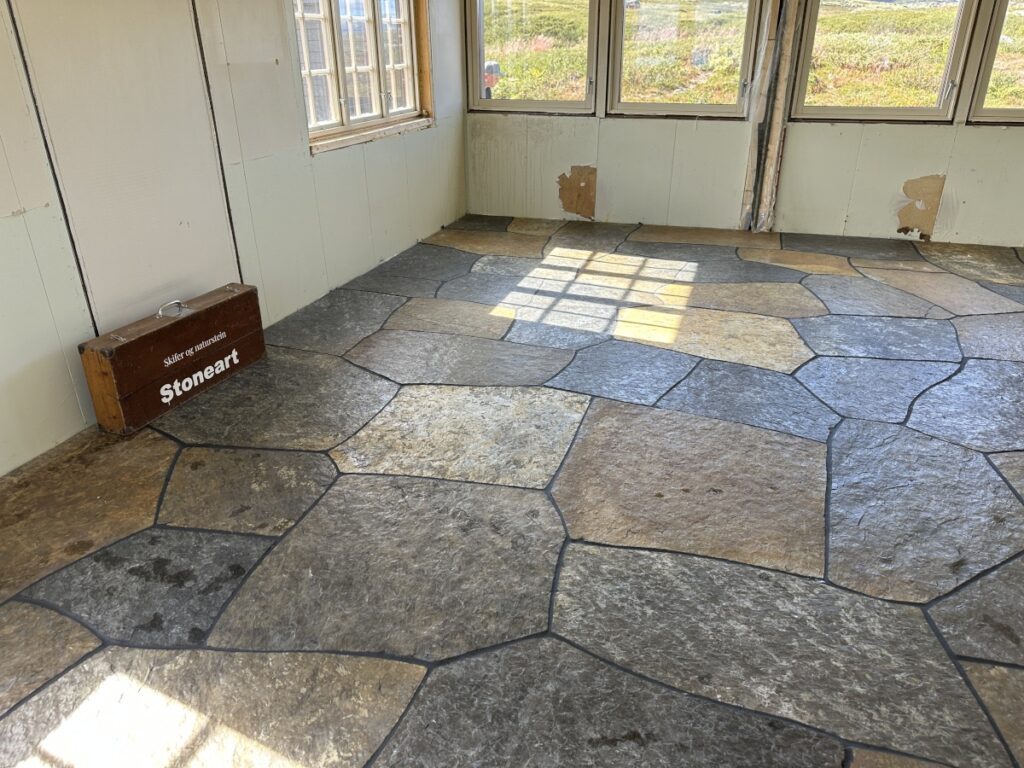


Installed as it was created
The numbered stones have been rebuilt using the project drawing and production markings. The surface has been checked, cleaned and jointed using a system appropriate for the supporting construction. The same composition created and reviewed in our production facility now forms the completed Norwegian Flagstone surface at the project site.
Important technical note
The installation must always be adapted to local ground conditions, climate, intended loads, substrate construction and applicable building requirements. Adhesives, primers, jointing compounds, binders and impregnating products must be selected and applied according to the manufacturers’ current technical instructions. Areas exposed to vehicle traffic, heavy loads, frost-sensitive ground or waterproof constructions require project-specific engineering.